


How To Make a Custom Invoice Template with Word
I would like to have an invoice form customized for my business. However, I don’t know where to begin.
Invoice forms can be quite difficult to design, especially if you have never done it before. As a business owner, you can take many routes to having personalized invoice forms produced for your company. You could hire a professional designer to create a form tailored to meet your business needs, but this may not be your most economical option. You may be able to find a printing company that offers templates, but they are not exactly what you are looking for. Your final option, create a custom designed invoice yourself. It is possible and you may already have the tool that you need to design your own invoice form. If you have Microsoft Word, then this tutorial will get you started in the right direction to create your own custom invoice template.
Step 1: Open Up Microsoft Word
Start Microsoft Word by either double-clicking on a shortcut that you have on your desktop or by finding it in your programs after you have clicked on the Windows icon in the lower left corner.
Step 2: Open a Template
After the program has started, you will probably see a blank document. Don’t be overwhelmed by all of that blank space, help is on the way.
– Click on File > New.
– In the search field, type in invoice then click on the arrow.

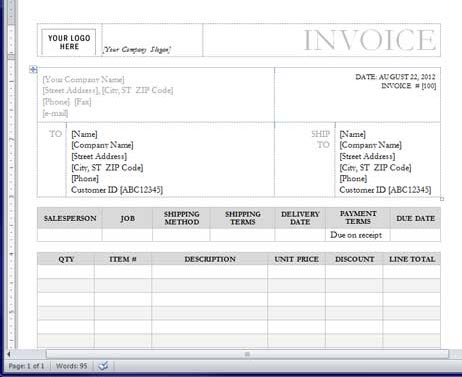
– Find a template that you would like to use, there are plenty to choose from. If you single-click on any of the templates, you will see a larger view of that template on the right-hand side. For this tutorial we will be using the template “Sales invoice (Garamond Gray design)”
– Double-click your mouse pointer over the template.

– Microsoft Word will open the template in a new window which is now ready for editing.

Step 3: Insert Your Logo or Other Images
Take a good look at this invoice template. It could have taken you hours to create this from scratch, but with a click of a button, most of the work has been done for you. Now we are going to personalize it with your company’s information and make any necessary adjustments. We are going to start from the top and work our way down to the bottom.
–In the top left corner, this template has a designated spot for your logo. Click on the box that surrounds “Your Logo Here”.
–Click on Insert > Picture.

–The Insert Picture dialog box will open up. Find and select your company’s logo where you have stored it on your computer. The image that will be used in this tutorial was saved on the Desktop. Microsoft will be able to insert typical image files such as .jpg, .gif and .bmp.

–With your logo selected, click on Insert. Microsoft will have replaced the text “Your Logo Here” with an image of your logo.

If you do not have a logo for your company, you can insert a clip art image that relates to your business.
–Select “Your Logo Here”.
–Click on Insert > Clip Art.

Word has opened a window to the right of your document. You are able to do searches for any type of images such as clip art or photos. We suggest going with the simplest image and one that doesn’t have a lot of color especially if your forms are just going to be printed in one color.
–Type in a keyword relating to your business. For this tutorial, we used the keyword “car” and found a simple image that symbolizes auto repair.
– Double-click the image that you want to add to your form. Word will replace “Your Logo Here” with the image that you have selected.

As long as you still have the Clip Art window open, you can change your image.
-Double-click on another image that you would like to place in your form.
–Once you have settled on the image, click on the X to close the Clip Art window.

Step 4: Company’s Slogan
In the cell next to the logo, there is a prompt to enter in the company’s slogan. If you have a company slogan and would really like to have it placed on your invoice form, feel free to type it in.
–Double-click on the text “Your Company Slogan” to highlight it.

–Type in your company’s slogan.

If you do not care to insert your company’s slogan or if you don’t have one, you can simply delete the prompt and leave that area blank.
Step 5: Merge Two Cells to Re-size Logo
If you opted not to include a company slogan, the top of the invoice may feel a little empty. As a result of the extra space, you can make the logo a little bigger.
–Place your cursor in the cell where the slogan used to be located. You will know that you have placed your cursor when you see a blinking line.

-Single-click your cursor in that same cell, but continue to hold down your mouse button.
–While holding down the mouse button, drag your mouse over to the left. This will highlight the left cell and the middle cell.

-Right-click over the blue area, a pop-up menu will show up.

–Select Merge Cells from the menu. The dotted line separating the two cells will disappear because the two cells have become one.

–Select your logo so that little circles show up in the corners around your image.

–Click on the top right corner of the image and continue to hold down your mouse button.
–Press then hold down the Shift button on your keyboard and drag your cursor to the right. If you do not hold down the Shift button while resizing your logo, it will get out of proportion and become distorted.
–Continue to drag your cursor to the right until you have reached your desired size. Try to keep the size within the cell.

If you increase the size of your logo so that it is bigger than the cell, all of your logo will not be visible. See example below.

Step 6: Entering In Your Company’s Address and Information
-Double-click on the text in the first line, “Your Company Name”. Type in your company’s name.

If your logo includes your company name, you don’t necessarily have to type it here. For this tutorial we are going to delete the highlighted section so that the first line will be “Street Address”. In doing so, we can type the City, State and Zip Code on the next line.

– Highlight the first line, then enter in the appropriate information starting with “Street Address”. Do this one line at a time until all of your information has been entered.

Step 7: Date and Invoice #
This template has automatically inserted the date, based on the day that the template was opened. We are going to change it so that the date can be hand-written in. We also want to leave enough room for the Invoice # to be written in or so that a printing company can number it after your forms have been printed.
–Place your cursor within the cell.
– Right-click your mouse, a menu will pop up.
– Select Split Cells.

Another dialog box will pop up. You are given the option to select how many number of columns and rows you would like to create out of this one cell.
– Select “2” for Number of columns.
– Select “1” for Number of rows.
– Click OK.

You should now see two different cells where there used to be one. The “Date” is in the cell on the left and “Invoice #” is on the right.

– Highlight the date that Word inserted after “DATE:” then delete it.
– Highlight “DATE:” then click on the Center Text button in your menu bar.

– Select Insert > Shapes > Line.

– Draw a line below “DATE:” while holding down the Shift button on your keyboard, this will keep your line straight.
– Select the line and move it around with the cursor keys on your keyboard to perfect the location of the line within the cell.
– With the line still selected, click on the Format tab at the top.
– The color of the line is not black. To change it, select the box to the left of the one that is highlighted; select “Subtle Line – Dark 1”.

– Delete “[100]” from the Invoice cell.
– Highlight “INVOICE #”.

– Click on the Center Text button.
You can leave the Invoice cell as is, especially if you plan on having the printing company number your forms for you. Or you can create a line such as the one we created for the “Date” cell if you plan on having your employees hand-write the Invoice #. If you want to add a line, just follow the same steps above.
Step 8: Customer Information
Notice the way that the customer information is set up on this template. It is perfect if you are going to type in the information, then print out the form after it has been completely filled out. Unfortunately, as is, your employees will have some problems filling out the customer information when they are on the job site. We are going to do some alterations to the template that will allow some space for hand writing in the customer’s information.
– Highlight all of the text in the cell to the right of “TO”.
– Press Delete on your keyboard. The cell will now be completely blank.
– Right-click your mouse over the empty cell. A drop-down menu will pop up.
– Select Split Cells.

– In the Split Cells dialog box, you will choose how many rows you want to create within that cell. For this tutorial, we are going to need one column and five rows, but if you need more or less, enter in the appropriate number. Press OK after you have entered in your numbers.
– Highlight all of the text in the cell to the right of the “SHIP TO” cell.

– Press Delete on your keyboard. The cell will now be completely blank.
– Right-click your mouse over the empty cell. A drop-down menu will pop up.
– Select Split Cells.
– Select 1 Column and 5 Rows, then press OK.
Your template should now look like the image below. Notice how the “SHIP TO” section is a little smaller, we will be adjusting that shortly.

– Hover your mouse cursor over the vertical line that separates the “TO” section and the “SHIP TO” section. The cursor will look like two arrows pointing in opposite direction with two little vertical lines in between.
– Click on the dotted line.
– Drag the line to the left until it is centered on the page or close to it.

– Click on the vertical dotted line to the right of “SHIP TO” and drag it to the left as well. Give this cell the same amount of width as the “TO” cell. Your form should look like the example below.

– Highlight the cells shown in the image below.

– Right-click your mouse over the highlighted area, a menu will pop up.
– Select Borders and Shadings.

– Select All on the left under Setting:.

– Click the drop-down arrow for Color, select the gray box as shown.

– Click OK. The dotted lines have now turned to solid lines, which will be visible when printed.

Now you can type in your desired text in each cell. You can use the same text in the image below or use something different.

– Highlight the cells to the right of “TO”.
– Right-click over the highlighted area.
– Change the size of the text to 8 points. 
– Highlight the text in the cells to the right of “SHIP TO”.
– Right-click over the highlighted area.
– Change the size of the text to 8 points. Making the size of the font smaller allows for more room to hand-write in the information.

Step 9: Making Final Changes
Take a look at the rest of the template. We shouldn’t have to make many more changes. If there is a column header that you do not like, you can simply revise it. It is as easy as highlighting the text and typing in what you want to show in that cell.
When we split the cells to have five rows in the previous steps, the height of that table increased. This pushed some text that was at the very bottom of Page 1 down to Page 2. You can either just delete that text or make some changes on Page 1 so that the text can fit on the bottom of the same page.

– Highlight two rows of cells within the last table.

– Right-click over the highlighted area.
– Select Delete Cells from the menu. – In the Delete Cells dialog box, click on Delete entire row.
– Press OK.

Now everything fits on one page. You are almost done.

– Highlight “[Your Company Name]” near the bottom of the page.
– Type in the name of your company.

Take a final look at the form and make any last changes. You may need to readjust things such as headers or lines, especially if you shifted any of the rows or columns.
Step 10: Save Your Document
If this is the first time you are saving the document, do the following steps. It is highly advisable that you frequently save a file that you may be working on for a long period of time. You would want to do this so that you don’t completely loose your file if something happens to your computer. Many people have lost files because the power has gone out or simply because the computer freezes on them and it needs to be restarted.
– Click File > Print.

This gives you a chance to see what the form would like printed out. It is especially helpful if you have tables and cells that don’t have any borders. You can see the borders (lines) that we added to the Customer Information section. If you recall, there were dotted lines that were around your company’s address, date and invoice #; but they are not visible now. If you want any extra borders you can go back to the document by clicking on the Home tab and make more changes before saving it.
– Click on Save As under File when you are ready to save your file.

– Select the desired location where you want to save the file. This file is going to be saved on the Desktop but you can also save it in Documents.
– Type in the name that you wish to give your form in the File name: field.
– Select “Word Document” as the File Type.
– Click Save.

The file that you have just saved will be editable in the future. If you need to send your file to a printer, they may request a PDF file. If this is the case, save your form as a Word Document and as a PDF because you will not be able to edit the PDF if you need to make any changes.
– Click File > Save As.
– Type in the name that you wish to give your form in the File name: field. You can use the same name that you used when you saved your form as a Word Document because the files will have a different file extension (.pdf, .doc, etc.).
– Click on the drop-down arrow for Save as type: and select PDF.

– Make Sure that the file is optimized for print, select the “Standard (publish online and printing)” button.
– Click Save.

Your file may open up in a new window using Adobe Acrobat Reader or with your default PDF viewer. This allows you to see what your file looks like as a PDF. If you do not save your file as a PDF and you use a font that your printer does not have, they may have to substitute it for a different font which may alter the look of your form. This may be very important if you use a certain font for the name of your company. If you send a PDF file to a printing company, they will be able to print your form exactly how you see it with a PDF viewer.

You have now finished designing an invoice form template for your business. Better yet, you were able to personalize the invoice to your specifications. With the help of a template from Microsoft Word, you were able to complete this in less time than if you had to completely design it yourself. Feel free to use any of the skills that you have learned from this tutorial in the future. Microsoft Word has a wide assortment of templates for various types of documents. Most of the steps in this tutorial can help you when you revise any other templates. Once your template is complete, you can print it off or send it to us to have it professionally printed on carbon-less NCR paper.
Continue to come back to our blog for more informative tutorials.
Tags: Invoice, Microsoft Word, Templates, TutorialCategorised in: Tutorials
This post was written by Progressive Printing Team