Setting Up a Business Card Template in Adobe Illustrator
I need a business card, but I want to design my own. Where do I start?
If you have access to Adobe Illustrator, then we have a tutorial that is perfect for you. This tutorial will guide you through setting up a template for business cards In Illustrator. This will help you to learn some of the basics of this program, then you can either print your newly designed business card on your own printer or upload your file to a professional printer.
Step 1: Open Up Adobe Illustrator
Start the program by double-clicking on the Illustrator icon on your desktop or by clicking on the shortcut in your task bar.
Step 2: Open New Artboard
You will need to open a new artboard with the correct dimensions.
– Click on File > New in your Menu Bar or use the keyboard shortcut Ctrl+N.
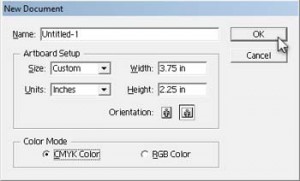
A dialog box will pop up after clicking on New. In this box you will enter in your dimensions. The typical business card is 3.5 x 2 inches, but this template will be a little bit bigger. If you have an image that will be printed to the edge or “Bleed” off of the business card, a bigger template will accommodate this.
– Enter in 3.75 inches as the width and 2.25 inches as the height.
– Make sure that the CMYK Color button is pressed as this is necessary for any printing projects.
– Click OK.
Step 3: Set Up Your Safe Zone Guide
Look for the Tools menu, it will have a bunch of icons.
– Left-click on the Rectangle Tool.
![]()
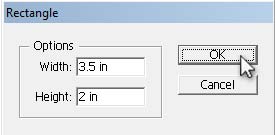
– Left-click your cursor anywhere on your artboard. A dialog box will pop up.
– Enter in 3.5 inches as your width and 2 inches as your height.
– Click OK and you will now see a rectangle.
– Select the rectangle that you have just created; selected objects will show tiny boxes in the corners.
– In the Align window, click on the circle button with a triangle. You will get a drop-down menu.
– Select Align to Artboard.

– Then click on the Horizontal Align Center and Vertical Align Center buttons. Your rectangle should now be completely centered.

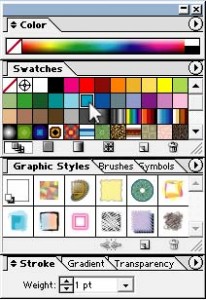
– Select your rectangle if it isn’t already selected. You are now going to change the fill and stroke (outline) colors.
– Near the bottom of the Tools menu, click on the solid box, this allows you to change the fill color of any shape in illustrator.
– In the Swatches menu, select the little white box with a red line going through it. This will change the fill color from white to None.
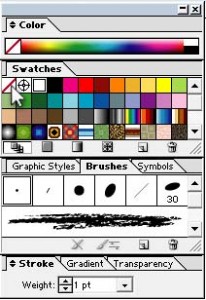
– Back in the Tools menu, select the Stroke option, which looks like a black box with a hole in it.
– After you have selected this option, you should have noticed that this option has moved in front of the white box. This is Illustrator’s way of letting you know which option you have selected.
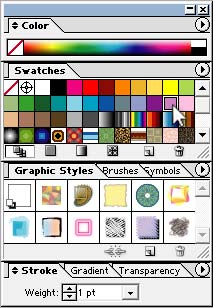
– In the Swatches menu, select the little “Pure Cyan” swatch box. After you have selected it, notice how a white outline shows up around that swatch. This lets you know what color has been selected as the stroke for this rectangle.
You are done setting up your safe zone. You should now see a rectangle that is centered both horizontally and vertically. The rectangle should have a cyan stroke (outline). Any text or images that you eventually place within these parameters (rectangle), will be considered safe.
Step 3: Set Up Your Trim Guide
You are going to go through the same steps to set up another rectangle that will act as your Trim Guide.
– Left-click on the Rectangle tool in the Tools menu.
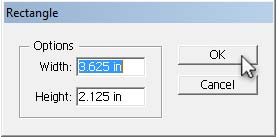
– Click your cursor anywhere on your artboard. A dialog box will pop up.
– Enter in 3.625 inches as your width and 2.125 inches as your height.
– Click OK. You will now see a second rectangle that is slightly bigger than your first rectangle.
– With your second rectangle selected, click on the Horizontal Align Center and Vertical Align Center buttons in the Align menu.
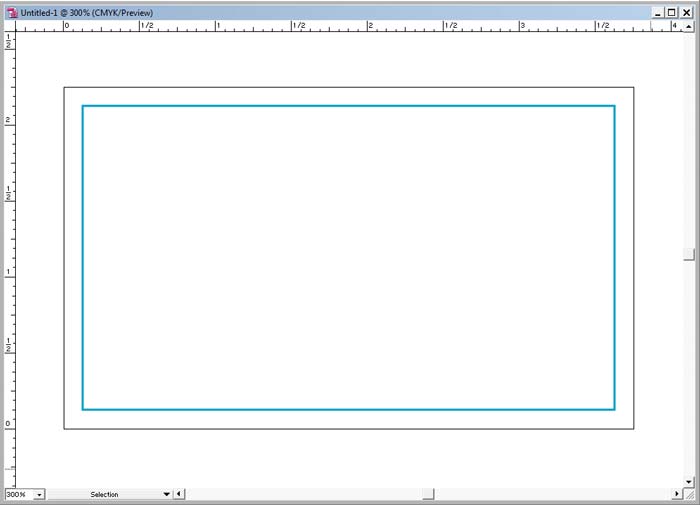
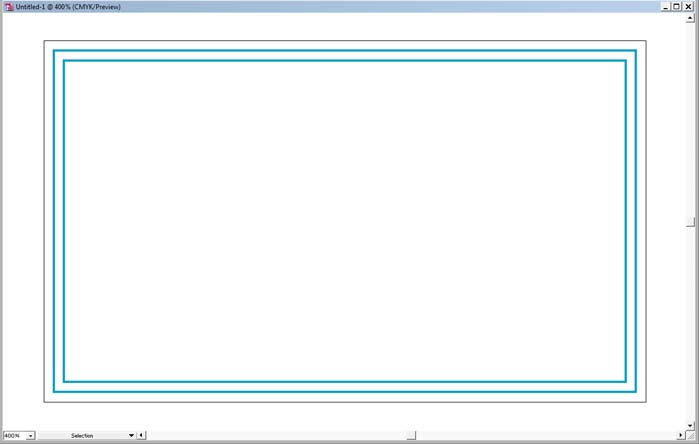
 Your two rectangles will be vertically and horizontally centered; they should look like the image below.
– Select the larger cyan rectangle.
– Click on the Stroke option in the Tools menu.
– In the Swatches menu, select the “Lavender” swatch box.
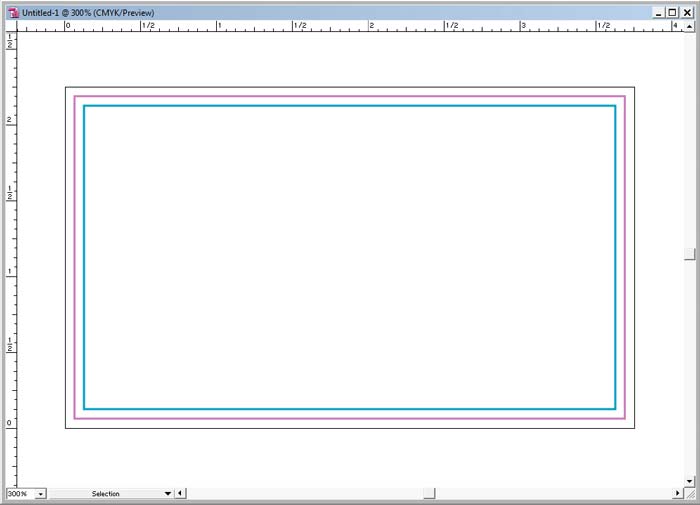
You should now see a cyan rectangle and a lavender rectangle like the image below.
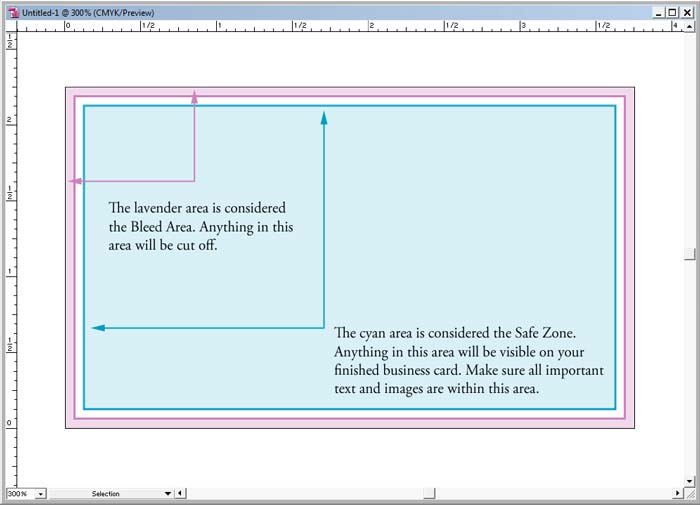
What should these boxes or guides mean to me?
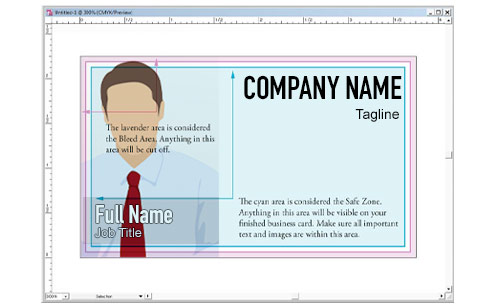
Any text or images within the cyan rectangle should be safe and visible on your finished business cards after they have been trimmed down. This area is considered the Safe Zone. Anything outside of the lavender rectangle will definitely be trimmed off; consider this your trim line. If you want any color or images to bleed off of your business cards, be sure that those items reach the edge of the artboard. If an image doesn’t go past the trim line (lavender rectangle), you may get an undesired white line on any of the sides of your business card after it has been trimmed.
Step 4: Final Steps and Saving Template for Future Use
Before you close or continue on with your business card design, you should do these final steps and save the template to your computer. You will then have a template on hand for the next time you design a business card. Since these are actual shapes on your artboard, unless you eventually delete them or hide them, they may show up in your printed design. You don’t want to pay for business cards and have these rectangles visible on the finished product. There is a quick and easy way to keep that from happening.
– Select your lavender rectangle.
– Right-click your mouse. A drop-down menu should pop up.
– Select the option Make Guides. Your lavender rectangle will turn to a thin bright blue colored line.
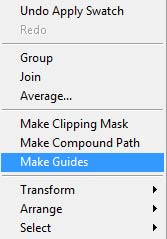 – Select the cyan rectangle.
– Right-click your mouse.
– Select the option Make Guides from the pop-up menu. You will now see two bright blue rectangles.
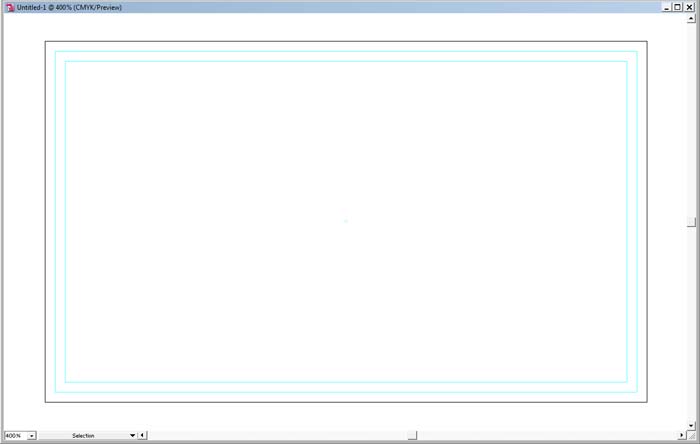
Illustrator has converted the two rectangles, referred to as paths, to actual guides. This means a couple of things. You are no longer able to edit the rectangles: you will not be able to move them, change their size or change their color. Also, even if the guides are visible on your screen when you are working on your design, they will not print out. To simply view or not view your guides, use keyboard shortcut Ctrl+; or from the top menu bar click on View > Guides > Hide/Show Guides.
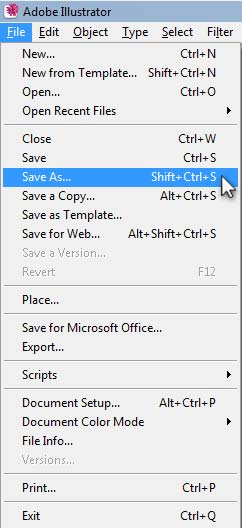
– Click on File > Save As from the top menu bar.
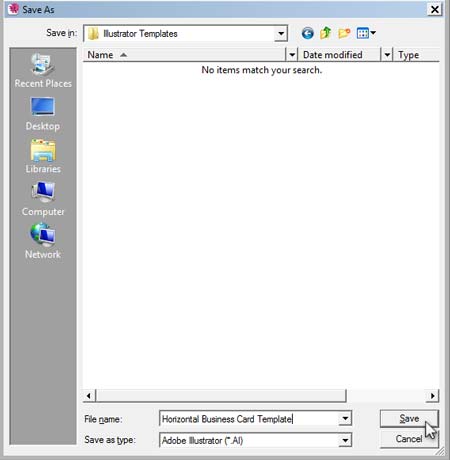
– In the Save As dialog box, select where you want to save your new template. In this example, we will be placing the file in a folder called Illustrator Templates on the Desktop. You can create the same folder or not, just be sure to remember where you place it.
– Type the name that you wish to give the template in File Name: field.
– Select the Save as type: as Adobe Illustrator (*.AI).
– Click on Save.
You now have a custom business card template that you can use over and over. If you open this template up in the future and want to use it for a business card design, your first step should be to click on Save As from the menu bar. Save the template as a different file name, for instance Business Card 1. That way, after you start to place any artwork or text, you don’t accidentally ruin your original template.
Stay tuned to our blog for additional tutorials, that will take you into the next step…designing an actual business card.
Tags: Adobe Illustrator, Business Cards, Templates, TutorialCategorised in: Tutorials
This post was written by Progressive Printing Team


