


Designing a Landscaping Invoice Form Using Microsoft Excel
 Today I will be using Microsoft Excel 2013 to design a lawn care services work order. The purpose of this tutorial is to help landscapers create a custom form based solely on their business needs. I will be using our lawn care services work order form as a base to work off of but will be transforming it into a layout that can be recreated in Excel or other spreadsheet programs.
Step 1: Document Set Up
You always want to be sure that your important information is .25″ away from the edge of the page so that it will not be cut off. Set your page margins by clicking on the PAGE LAYOUT tab. From there, click on the pop out button.
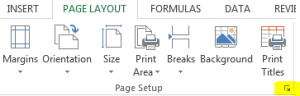
On the first page, let Excel know what orientation your form will be. I chose horizontal. Then click on the margins tab to set your margins.

You may see a faint dotted line running vertically and horizontally across your blank document. Excel is letting you know where your page margins are.
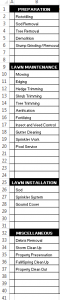
Step 2: Checklist
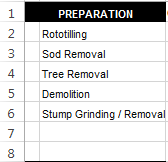
The lawn care service work order has check boxes for marking off job requirements and Column A looks like a good spot to place them. Click on the line dividing Column A from Column B.
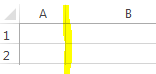
Drag that line to the left, making Column A as small as you’d like.
Since the lawn care service work order has a long checklist, I’m going to begin typing my list in Column B.
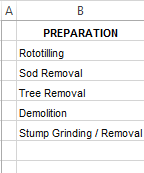
The checklist has about 4 headings and these headings should span both Column A (the check boxes) and Column B. Left click on cell A1 and drag your cursor to the right to highlight cell B1. At the top, Under the HOME tab, find the Merge & Center button.
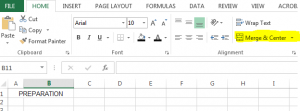
Once clicked, your heading will span across both Column A and Column B. Repeat this for each of your headings.
To make the headings stand out, you can now go back and add a background to the cell. Click on A1 to select the first heading. In the HOME tab look at the font section and locate the Paint Bucket. Choose a color. With A1 still selected, click on the “A” next to the paint bucket and choose white for the text.
Repeat this for each heading.
Step 3: Materials
The materials section will start at cell C1 and span across to cell G1 down to Row 17. Drag the line divider between Column C and Column D to the right to make a quantity column. Depending on how wide Column D is, you might want to expand it a little to the left to make room to list materials. Merge Cells E1 and F1 for the “Unit” column. G1 will be the “Amount”.
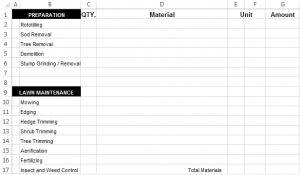
For right now, leave the rows beneath “Unit” separated. We’ll fix that when we’re putting in the lines/borders.
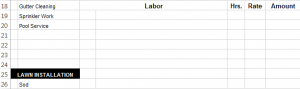
Step 4: Labor
The labor section will begin at Cell C18 and span across to G18 down to Row 26. Select C18 and D18 and merge those cells. Label this merged cell as “Labor”. The other columns will become “Hrs”, “Rate” and “Amount”.
Step 5: Company Name and Information
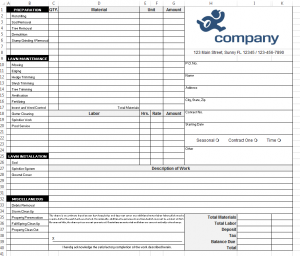
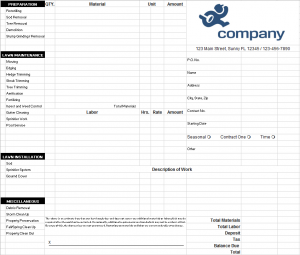
Merge H1 through K1 down to Row 7. Select the merged cell then click the INSERT tab at the top, find the Pictures button, and click on it. Locate your company logo. If your logo is too big for the area, you can use Excel to crop or resize it by right clicking on the image and choosing Format Picture.
By clicking on the picture and selecting it, you can drag it to wherever you want inside that cell. I moved the logo I’m using to the center.
For the company address, merge and center H7–K7.
![]()
Step 6: Customer information
Start the customer information section on H9 and skip every other line so that there is more room to write. Make lines for the order number, customer name, address, city, state and zip, contact number, job starting date, and a place to check off what type of job this will be.
I’ve also included an “Other” line for special jobs that might come up or for any other information that may need to be included in the customer’s file.
Step 7: Description of Work
The description of work is going to extend all the way across the lawn care service work order form. Select C27 through K27 then Merge and Center these cells. Type in “Description of Work”.
![]()
Once again, I am just going to leave the other lines where they are until I am ready to stylize the form.
Step 7: Signature Line
Select C35 – G35 down to Row 37 then merge and center to create a blank box to type the terms and conditions into. Once typed, you can use the font section under the HOME tab to stylize your text.
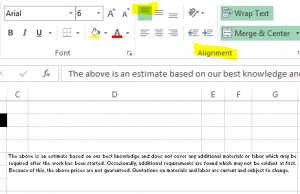
The alignment section next to the fonts will help you position the text inside the cell. If your text is toward the bottom, choose the first option in the alignment section to position the text at the top of the cell.
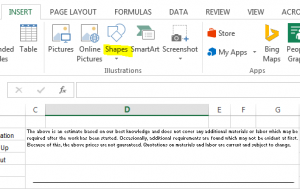
Next merge and center the two rows below the terms section. This will be an area for the customer to sign. To insert a signature line, go to the INSERT tab and click the Shapes button. Choose the straight line then left click inside the signature area and drag your cursor to the left.
Your line might appear blue so double click it to get the Shape Styles toolbar to appear at the top of the document. Choose black.
Customers might not know what the line is for so we need to add an “X” to the line. Select the cell and type “X”. The line will disappear when the box is selected but it’s still there. Go to the HOME tab and from the alignment section, justify the text to the left then hit the Indent button so that the “X” will not be against the divide line.
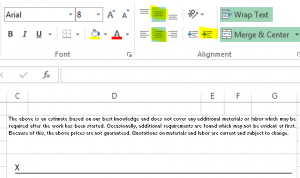
When you click out of the cell, your signature line will appear again and your “X” should look like the one above.
Add any additional clauses you may have to C40 and center it so that it appears under the signature line.
Step 8: Totals
H35 and I35 will be the “Totals” area.

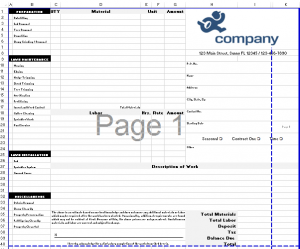
Your form should look something like this:
Save and export your form to see how it looks.
Note: If you exported your pdf and you see you have extra room, it’s likely because the columns moved inward while you were building your form. Return to your Excel document and go to the VIEW tab and click on the Page Break Preview button. The preview mode is helpful for getting the most room out of your form. Drag the column dividers until you reach the end of the first page.
It doesn’t matter which column you extend as long as you don’t break into multiple pages. The first one I tried to lengthen was the customer contact section followed by the materials and labor columns. Once I made those bigger, I clicked on the column divider closest to the dark blue line and tried moving it a little further until I got to the second page, just to see how much more space I had.
If you see this, you’ve gone too far to the left:
Just drag the column divider back to the left a little. When you are done, click the Normal button to return to the default layout.
This should help your form extend to your .25″ margins.
Once you are certain everything is where it should be on the form, it is time to start laying down the lines.
Step 9: Drawing Borders
As you probably noticed in Step 8, when exporting the light gray lines you see in Excel do not show on the PDF or when printed. That is because the light grid lines are just guidelines so you know where the cells are.
So that the landscape work order form will have divided areas and lines to write on, we have to draw the lines in. Under the HOME tab, in the font section, there is a Borders button.

Click that button and choose Draw Border from the drop down menu. Your cursor should now look like a little pen.
Place the pen at the top left hand corner of the document and drag it across your page to the bottom right corner of your form (this should be K40). This will create a black line around the form.
Next, draw in all of your vertical lines.
Notice that I did not draw in the line in the middle of “Unit”. That is because we’re going to merge and center those as well as the lines beneath Description of Work and the other areas.
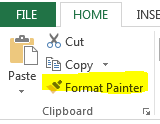
There are a lot of horizontal lines. But don’t worry, there is a fast way to do this. Starting at the checklist section, draw in the first vertical line. Select both A2 and B2 then click on the Format Painter.
Your cursor should now be a + symbol with a little paint brush. Left click on A3 and drag the cursor over to B3 then down to the cells above the first checklist header. All the lines there will now have a border. Repeat for the sections below.
You can do the other areas the same way we just did the checklist. Under “Unit”, select E2 and F2 and then merge and center those cells. Go back and select the border pencil and draw in the first two horizontal lines. Select C2 – G2 then click the Format Painter button. Paint all the way down to Row 17.
Under the “Labor” part, select C19 and D19 then merge and center those cells. Drawn in your horizontal lines then once again use the Format Painter to paint in the rest of the “Labor” section. Repeat the same steps for the “Description of Work” and “Totals” area.
For the “P.O. No.”, merge and center H10 and H11 – K10 and K11. The text is now in the top center of the cell. Using the alignment tools, justify the text to the left then draw the lines in. Once the first box is done, you can select it then choose the Format Painter and fix the remaining boxes.
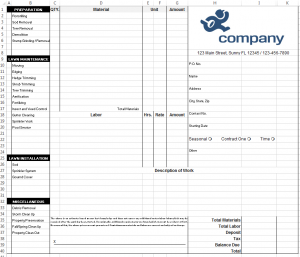
The lawn care service work order form is all finished and you can now go to File-Export and Save as a PDF for printing.
Tags: Excel tutorial, landscaping invoice form, Landscaping work order forms, Microsoft Excel, TutorialCategorised in: Tutorials
This post was written by Progressive Printing Team