


Creating Invoice Template using Adobe Photoshop
You probably would not think of Photoshop as your first choice to design invoice forms. However, in this step by step tutorial we will show you that Photoshop is more than a picture editing software. You can easily create an invoice form for your company while you learn some basic features of Photoshop Elements. Step by step instructions with visual aids are provided here to help you create many other forms you may need in the future. You will notice in this tutorial that creating lines, copying and pasting, inserting texts are the main features used. Whether you are new to Photoshop, or an expert at other programs you will find this easy to follow tutorial convenient and helpful to get started.
Step 1: open Adobe Photoshop Elements
Locate the PSE icon on your desktop or
Click on the Windows Button > All Programs > Adobe > Adobe Photoshop Elements or
Click on the Windows Button > Click in the search bar right above > Type in Photoshop Elements > Photoshop will be under Programs >
Click to launch Photoshop Elements.
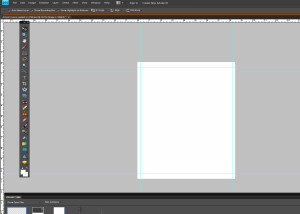
Step 2: Creating a New Document
Starting from scratch, you will create a new document and set the size of your invoice form which is the same size as your final invoice forms paper.
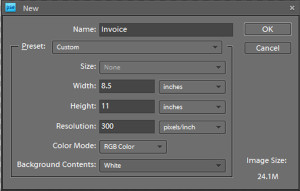
On your menu bar, click File > New > Blank file
A Dialog Box will pop up. This is where you choose the height, width, resolution, file name and the background type of your document.
Enter the following information: Name â (Your file name), (standard size invoices) Width 8.5, Height 11, (small size invoices) Width 5-5, Height 8.5 (legal size invoices) Width 8.5, Height 14, Resolution 300, Background White > Click Ok
(Make sure to select inches and NOT pixels for the document sizes. The resolution determines the quality of your document and may increase your file size)
Remember to save your document in this 1st step and save as you go. Because unlike Microsoft applications, Photoshop does not have an AutoSave feature to back up your documents in case your computer crashes.
Step 3: Setting up your Margins in PSE:
In order to set up your margins, you will need to see your rulers. They are usually located vertically on the left side of your window. And horizontally on the top of your documents page. If you can’t see your rulers, they may just be hidden.
Assure that a check mark is next to Rulers and Guides
On your Menu bar click View > Rulers then View > Guides
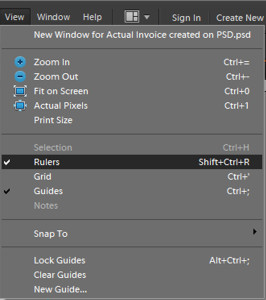
To set the left and right margins, you will left click the vertical ruler once, hold and drag as the pointer turns to a double headed arrow with vertical lines in the middle. Notice a dotted line moving across the document as you drag, will then turn to an aqua blue line once stopped a the desired spot on your document. Repeat this step to place another line on the other side of the document. Repeat the same steps above to set the margins for the top and bottom of the document this time from the horizontal ruler located at the top.
Photoshop allows you to place as many guides as necessary to help your spacing for margins and many other things.
Step 4: Inserting Text
Now you are ready to start creating your Invoice form.
On your Tool box shortcuts to the left, select the Horizontal Type Tool
Your pointer now looks like a capital “T” and indicates you are ready to insert text.
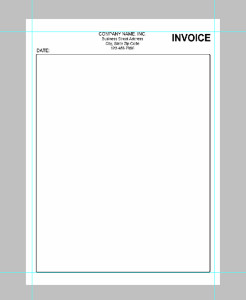
Click on the right corner of your document, and type Invoice.
Highlight the text, on the text formatting toolbar right below the menu bar enter the desired font size. Here we used 30 pts and Bold style.
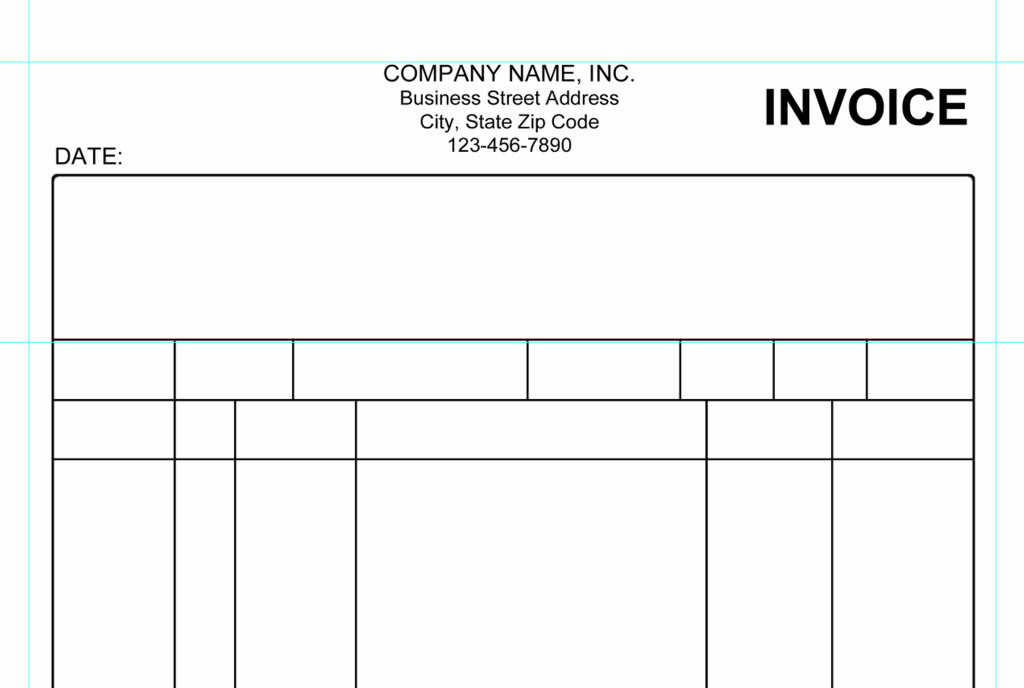
Insert the following text at the top of your page and Center Align as it appears below:
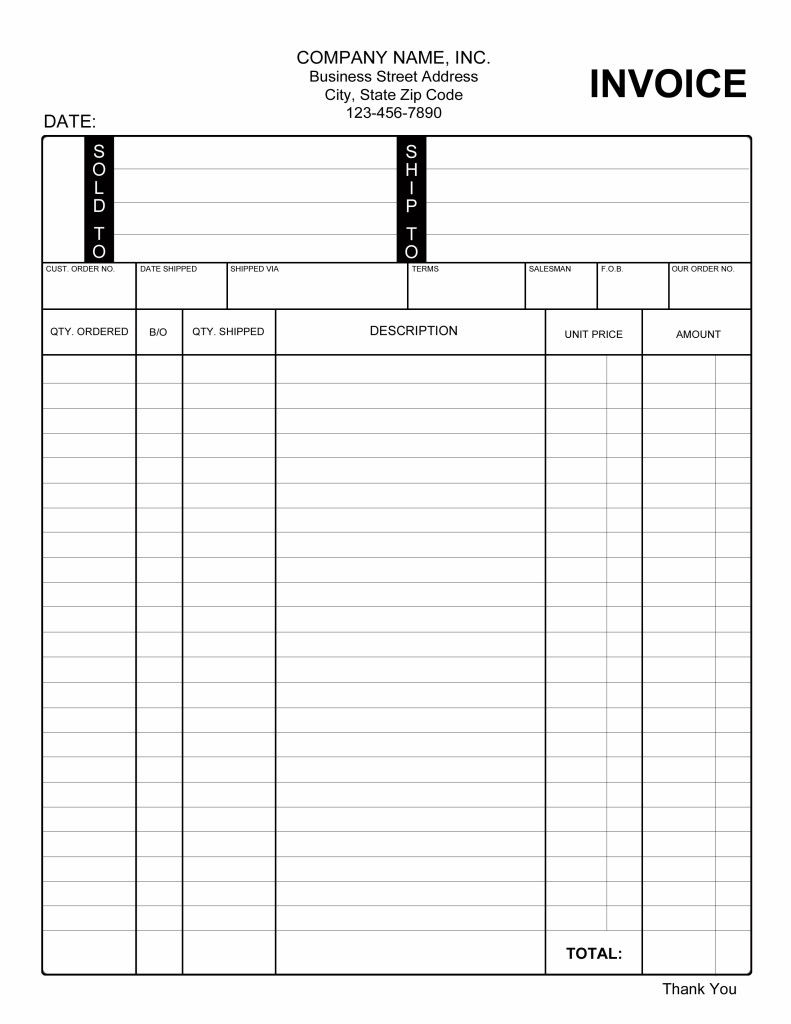
COMPANY NAME, INC
Business Address
City, State Zip Code
Phone #
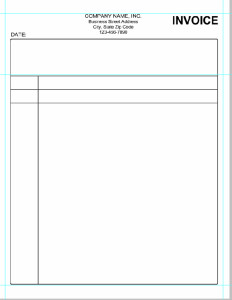
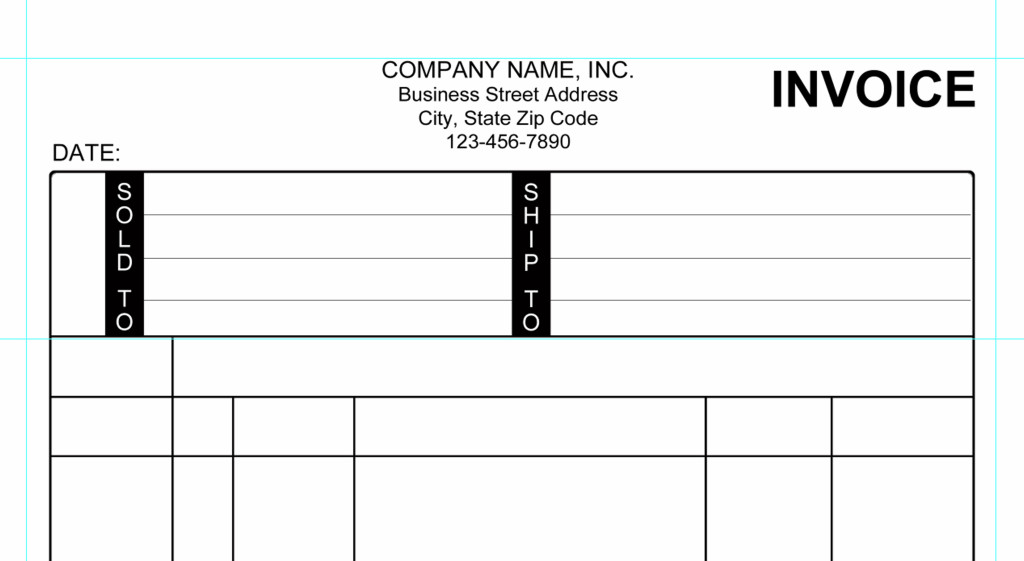
Insert “Date:” on the Top Left corner of your document.
To move text around the document, highlight the text, move pointer to surrounding area, hold and move the pointer around when the cursor turns and a 4 headed. Or select the move tool on your tool box and select the text to move it around
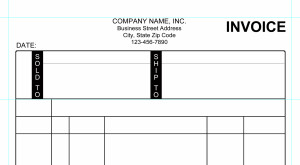
![]()
Step 5: Creating Shapes, lines and adding vertical text
Creating shapes in Photoshop is very easy
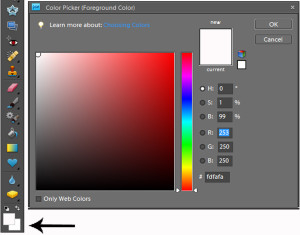
First make sure that the color white is selected as your foreground color in the tool box color panel.
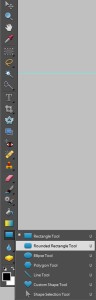
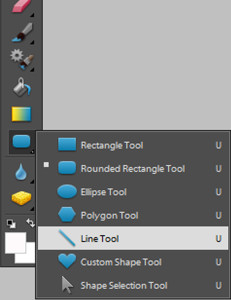
Next, locate the shapes tools by right clicking on the icon to open the sub group and find other shape options available.
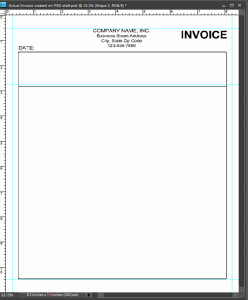
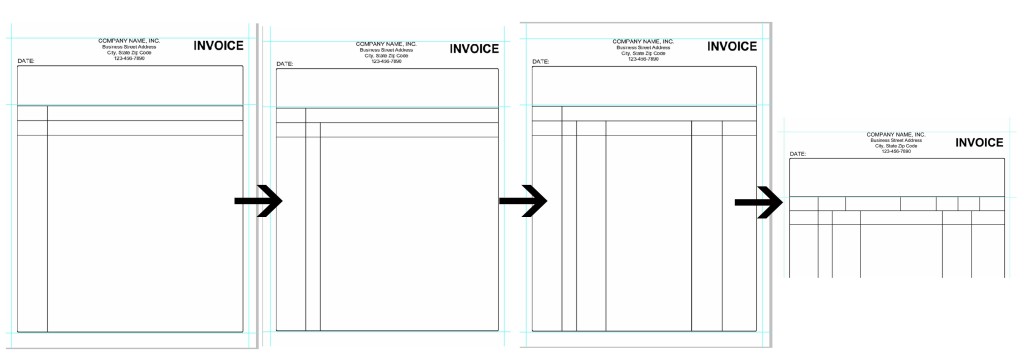
Select the rounded rectangle tool to create the biggest box of the form.
After selecting the rounded rectangle tool, the cursor changes to a crosshair. You will now place the cross hair at approximately 1.50 in x .50 in on your document. Click, hold and drag diagonally to create the box.
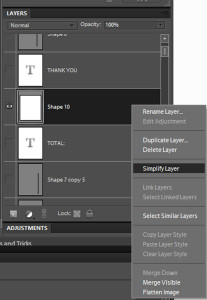
With the box still selected in the layers palette, right click on the layer and select simplify layer.
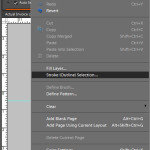
Then on your menu bar click on Edit and select Stroke (outline) selection. The Stroke dialog box will pop up.
Insert the following information: Width 5 px (pixels) for thickness, color black, location outside.
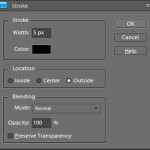
Select OK to exit dialog box.
On your tool box in the same sub group of shapes, right click to select the line tool.
Place the cross hair at approximately 2.75 in x .25 inches inside the left side of the box and drag the line across to the right side of the box. Be sure to slightly adjust the line as necessary until perfectly straight.
Click on the move tool from your toolbar.
With the line still selected from the layers panel, right click on the line shape layer and select Duplicate layer. Select ok to crate and exit duplicate layer dialog box.
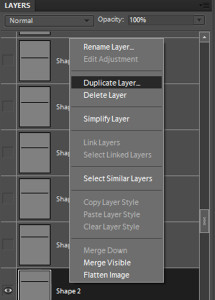
Right click on the layer and select Simplify Layer. Move line below to desired location on form using your mouse, or navigation arrow keys on your keyboard. Place line at about 3.4 inches below the first line. Repeat this process for the 3rd line. Compare your form to the image below.
On your tool box select the line tool. Place the cross hair at approximately 2. 75 in x 1.50 in from the first horizontal line drag the line down to draw a vertical line within the box. Be sure to slightly adjust the line as necessary until perfectly straight. With the line tool still selected, draw another vertical line from the second horizontal. Click on the move tool from your toolbar. With the line still selected from the layers panel, right click on the line shape layer and select Duplicate layer. Select ok to create and exit duplicate layer dialog box. Right click on layer and select Simplify Layer. Move line across to desired location on form using your mouse, or navigation arrow keys on your keyboard. Repeat this step 3 times to create 3 additional lines and short lines between the 3 horizontal lines. See the image below.
Now we are going to create two rectangles with the wordings, SOLD TO, and SHIP TO.
Make sure that the foreground color black is selected on the color palette on your toolbar. Right click the shapes on the toolbar to select the rectangle too. Create a black rectangle about .35 in right below the word “Date:” Connecting to the first horizontal line. On your toolbar, select the Type Text Tool, right click and select the Vertical Type Tool. Select White as your text color on the color palette. Place the Insertion point on the black rectangle and type SOLD TO adjust the font size at 14 pts, and font style at regular. Click on the move tool from your toolbar and arrange the word as needed to fit inside to fit inside the black rectangle. On your Layers panel, select the Sold To layer and hold down the “Ctrl” control key, allows you to pick random items on the layers panel. Right click on either of the highlighted layers and select duplicate layer. Click ok to exit dialog box. With both layers still selected, click and drag both items over at 4.25 in below the business title. Then select the Text Tool to edit the word SOLD to SHIP. Compare your form with the preview below.
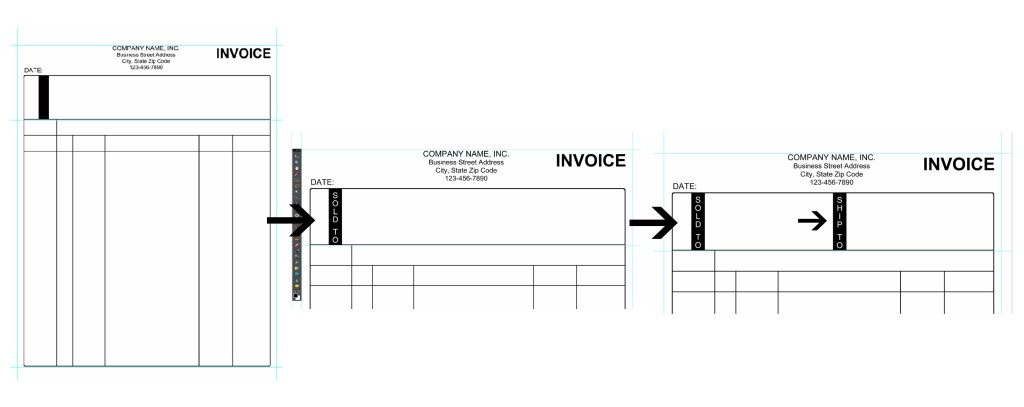

Now place cross hair at 1.75 in x 1.25 in and create a horizontal line across.
In the Layers Panel select lines layers, click hold and drag to rearrange order of layers. Be sure to have the 3 lines below the black rectangles and the words (Sold To, Ship To) in order to have lines shown in the background of these objects.
Then, right click on the layer in the Layers panel to duplicate it. Repeat this process to create another line. Arrange lines about .50 inch apart. See image below to compare.
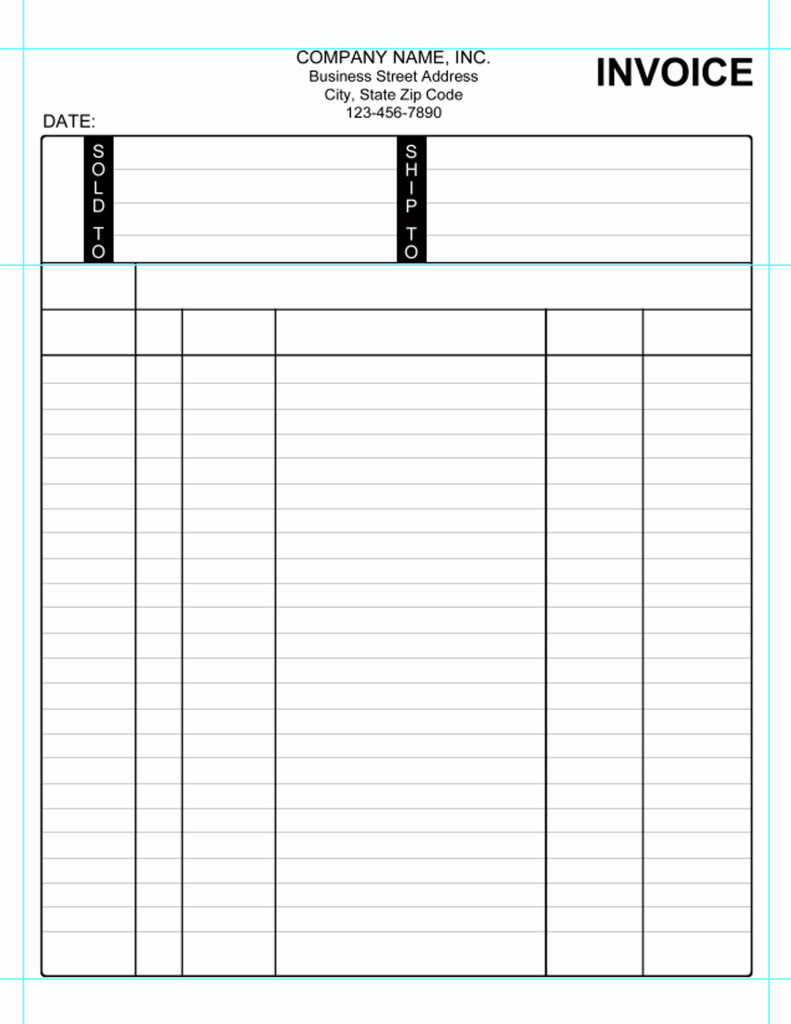
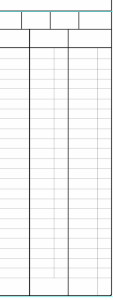
To create remaining horizontal lines, place cross hair at 4.125 inches below the 3rd horizontal line and drag across. Then, right click on the layer in the Layers panel to duplicate it. To multiply duplication, hold down “ctrl” or “shift” key on your keyboard to select multiple lines. Right click on highlighted lines and select duplicate layers. Click OK to exit Layers Dialog box. With the move tool selected drag lines down to adjust or use navigation arrow keys on your keyboard. Repeat this process to create about 23 lines. Arrange lines about .25 cm apart.
Also create 2 vertical lines on the right side of form to separate dollars from cents as shown below. See images to compare.
Step 6: Adding Horizontal Text
On your Tool box shortcuts to the left, select the Horizontal Type Tool
Click where necessary to begin typing the text in upper case letters for each cell in your document.
1st row – Font size 6 pts and Regular style.
2nd row – Font size 8 pts and Regular style.
Description – Font size 10 pts and Regular style.
TOTAL – Font size 12 pts and Bold style.
Thank You – Font size 12 pts and Regular style.
Compare your form to the image below.
Now you are ready to save your file in the format you desire.
Go to file > Save as and click on the format drop down options select format preferred, File name, and location to save the file and click Save.

Categorised in: Tutorials
This post was written by Progressive Printing Team